Why Ubuntu Server 16.04?
Ubuntu Server 16.04 adds some much needed upgrades to the repositories, meaning less time compiling from source. Big updates:
Nginx 1.10.0 – HTTP/2 support built in!PHP 7.0MySQL 5.7 (Major security update with empty root password)
Getting started
First and foremost, download Ubuntu Server 16.04. Download the 32/64-bit version from here Create your bootable image using your favorite method. For Windows I recommend Rufus: rufus Mac UnetBootin generally works well: unetbootin Linux: Dependent on what flavor you are using you can either use the GUI tool you already have, or terminal. For terminal, determine your USB device and then from the location of the image execute the following command in Terminal. Replace the image name with the full name of the file downloaded. While you can increase the blocksize, 512 is safe and less likely to produce an unbootable image.
Install the base Ubuntu 16.04 system
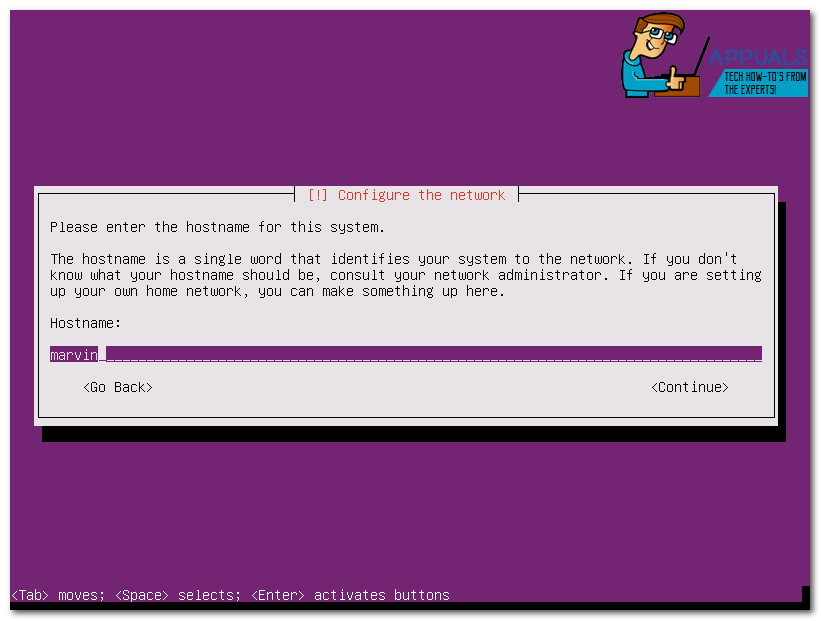
Choose your language and keyboard layout. If you are using standard English, you can just hit enter a few times to get through this part. Enter the hostname for your computer:
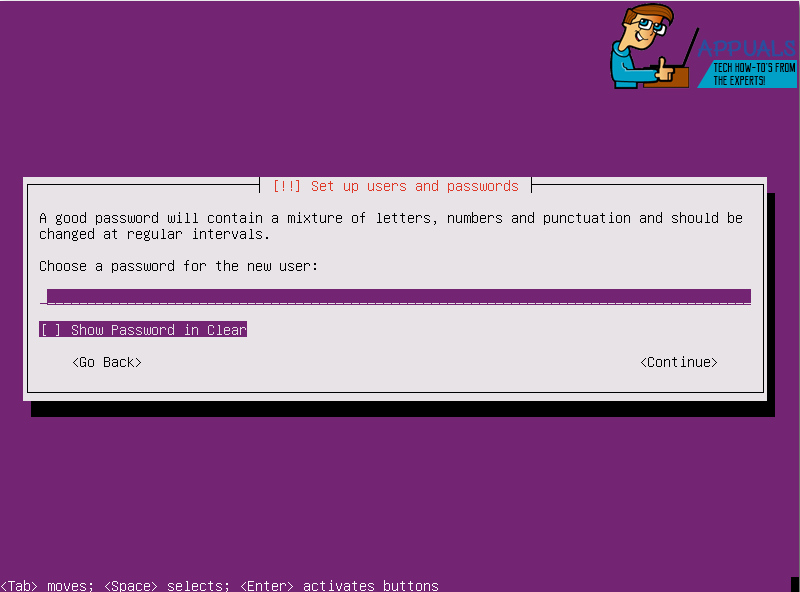
If you are doing this in a work enviroment, you either know what it should be or who to ask. If you are doing this at home, name it what you care to (this computer really seems to be a marvin). Next is setting up the primary user and password. TIP: If you have multiple systems running Linux, one very nice feature is that if you are utilizing the same username on each of them, tunneling with ssh and sftp can be used without having to enter the username. New to 16.04 is the option to show the password in clear text during setup.
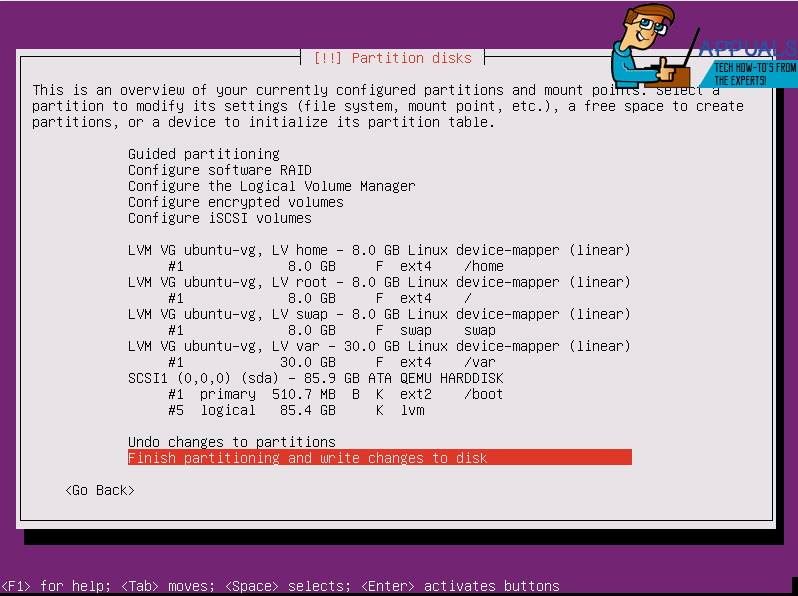
Choose whether or not to encrypt your home directory, I don’t, but I also don’t keep sensitive data in my home folder on a web server. Choose your time zone (it should already be correct if you are connected to the Internet in the location the server will be used). Time to set up partitioning. I highly recommend LVM so that you can use snapshots for backing up. Here is a layout example for LVM:
Note, I am only using a 1 to 1 ratio for swap, as I don’t dip into it very often. I have also left some room for future assignment, you don’t need to do this, but I often have other partitions planned and want the space for them. You will have to assign mount points to each of the logical volumes, for mine I use / (root) /home /var and swap. Note: When using LVM you do need to make a separate boot partition, as well as efi boot partition. The efi boot partition is not shown above as this was done in a KVM instance. Finish up the partitioning, if there are any errors you should be prompted to what needs corrected. The base kernel gets installed once you have your partitioning done, it usually takes one or two minutes. Once this is done you will be prompted for proxy info, if you are not sure just hit enter. A few more components will then be installed before you are prompted for your preference on package updates. I don’t do auto updates, at least not since getting woken in the middle of the night to fix a server that was had dependencies broken by updates…
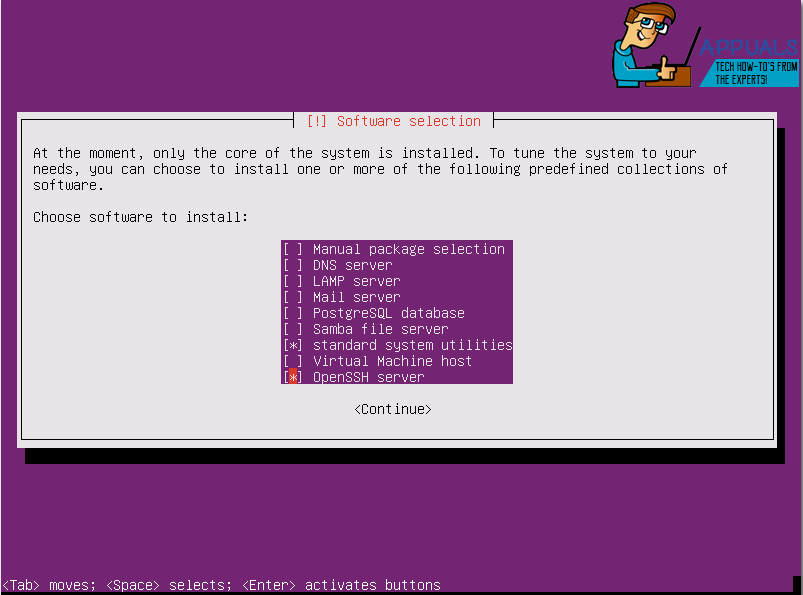
Package selection
For the purposes of this how to, I am only going to choose OpenSSH server and standard system utilities.
Once you continue, the selected packages will install and then you will be prompted to install GRUB. After that finishes, remove your install media and hit continue. Finally, getting to the good stuff!
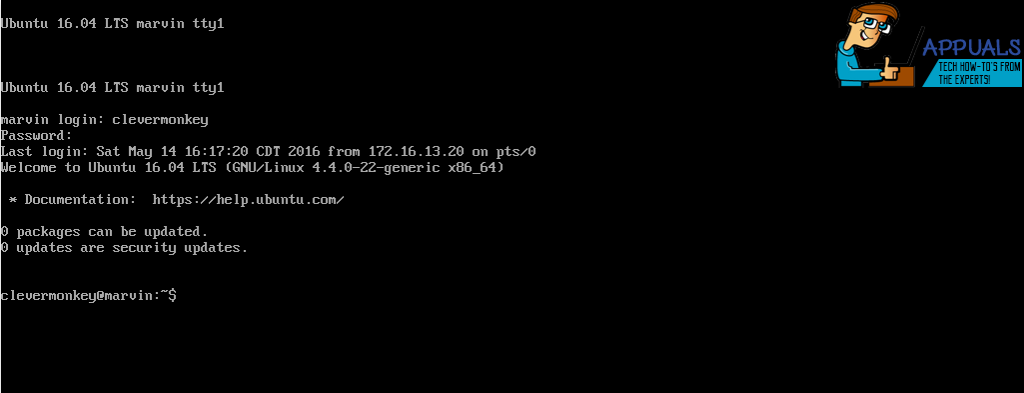
Now you can either ssh tunnel into your server, or log in. I like to tunnel, since I don’t regularly keep a keyboard and monitor on my servers (also, the ability to scroll up easily is nice too!) If you don’t know the address, you can get it easily by simply logging in and entering ip address . This will give you a list of each of you network devices and their addresses. If you are tunneling with the same user name the command is (replace 1.2.3.4 with the correct ip): If you are tunneling with a different user name: Accept the fingerprint and enter your password. Now update everything: This may be quick, but often takes a couple of minutes. Assuming everything went according to plan.
Quirky Xerus 8.6 features latest DEBs from Ubuntu 16.04.xUbuntu 18.04 LTS Bionic Beaver Officially Available for Ubuntu, Kubuntu,…SOLVED: “Unable to initialize audit layer: Permission denied” bug in libvirt-bin…How to: Create an Ubuntu Bootable USB on Mac, Windows or Ubuntu
