A slew of updates to Visual Studio in just recent weeks has added Linux and Mac compatibility – and Microsoft also launched Xamarin Live, a tool for testing and debugging Android apps without an emulator. This could prove to be a major leap forward for Windows-based Android developers. Compared to other IDEs (integrated development environment), Visual Studio has its own pros and cons. Visual Studio offers remarkable cross-platform development support for C++ programmers, and being a native Windows IDE, it’s certainly less troublesome for non-Linux enthusiasts to get up and running. The drawbacks would be its over-abundance of GUIDs, and slower debugging compared to other IDEs. But if you’re interested in developing CPU-intensive apps in C++, Visual Studio is an IDE worth its price.
How to Install Visual Studio on Windows
Requirements:
Visual Studio 2017 Xamarin Live [Optional] Download the Visual Studio installer package and when you launch it, you’ll be asked which components you want to install. For Android development, look under “Workloads” and choose “Mobile development with C++”, then choose “Android development”.
Visual Studio will install the Visual Studio editor, C++ debugger, various Android build tools, compilers, and some other necessary resources. You can also optionally install the Google Android Emulator from inside the Visual Studio installer, but Xamarin Live is worth considering – it’s an app that runs on your Android phone, and can hook into your Visual Studio resources to allow live previewing and debugging of your Visual Studio apps directly on your Android phone.
Android C++ Development with Visual Studio
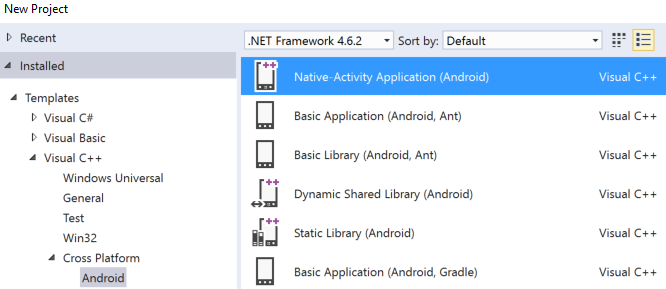
Launch the Visual Studio editor and navigate to File > New > Project > Visual C++ > Cross Platform > Android. Give your app a name and press “OK”.
From here you can choose the template you want to work with – there’s a bunch of them to choose, but most graphic-intensive apps will go with the Native-Activity Application (Android) template. You’ll be presented with the Solutions Explorer menu – there’s two projects available here, which are: MyAndroidApp.NativeActivity – This contains all the references and glue code you need for running your app as a native Android activity. MyAndroidApp.Packaging – This contains the AndroidManifest.xml and build.xml, and will package your app into an .apk file for installing on Android devices. I’m not going to walk you through coding an app, but after you’ve created a project, you can navigate to the Solutions Platform menu and choose the device architecture you’re compiling for, then press F5 to run the app in the emulator you’ve connected to Visual Studio, or send it to Xamarin Live on your device for previewing and debugging there instead.
Editing and Debugging Java Code
If you’re aiming for a Java-based app instead of C++, you’ll need the Visual Studio Java Language Service for Android – this will enable a text-editor that colorizes your Java strings. When you’re done editing your Java code, you can go into the Visual Studio debug menu and choose “Java Only” from the Debug Type menu.
Connecting Xamarin Live to Visual Studio
If you’d rather preview and debug apps directly on your Android phone instead of an emulator, Xamarin Live is for you. First you need to install the Xamarin Live app from Google Play onto your Android device. Then grab the Xamarin Updater for Visual Studio 2017 and install it on your PC.
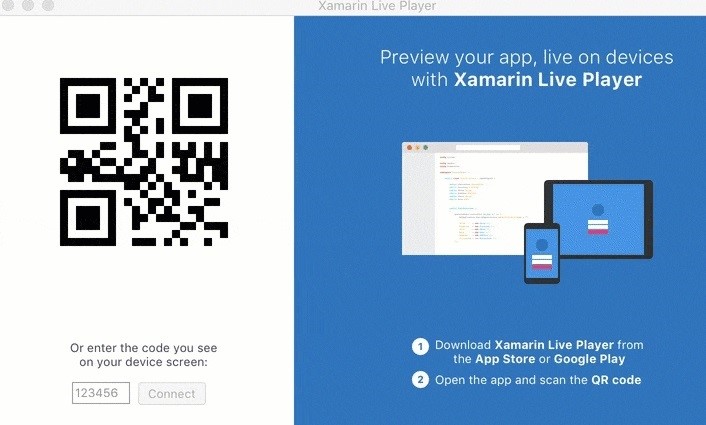
Now you’ll need to create your Android app as a Xamarin project, and you’ll be prompted to pair your device via QR barcode on your screen. When you want to send your app to Xamarin Live for testing on your device, simply choose the “Run” button from inside Visual Studio and choose one of the following options: Start Without Debugging: This lets you edit the app directly on your device, and the app will be restarted whenever code changes are made and saved. Start Debugging: This allows you to inspect your app’s variables and breakpoints, but code cannot be edited. Live Run Current View: Here you can edit the app inside Visual Studio and see the app changes on your computer screen. Basically it streams the Xamarin Live app window to your desktop. That’s all for this guide! Short of holding your hand and walking you through coding an app, there’s isn’t much more to add. You may be interested in the following Appuals topics though: How to Create a Basic Android App in Phonegap How to Build a Custom ROM from Android Open Source Project | Pt. 2
Visual Studio 2017 version 15.7.6 Now Supports JDK 8 Update 181 8u181Microsoft Visual Studio Code Editor Official Build Latest Version Available For…How To Make An Android App For Your Smart Home System on Android Studio?How to Sideload Android Apps on Windows 11? Android Subsystem for Windows 11


