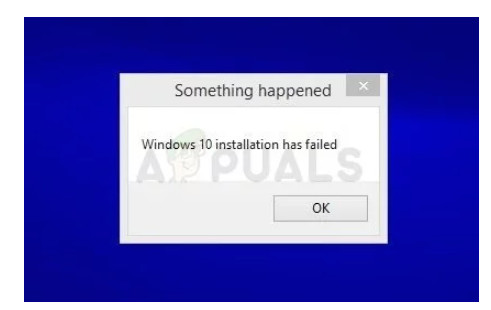
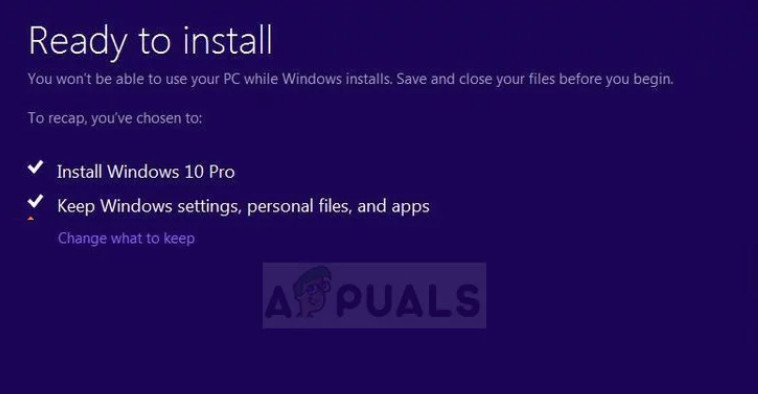
After investigating this issue thoroughly and looking at various user reports, we realized that this error can actually be rooted in a variety of different scenarios. Here’s a list of culprits that you should troubleshoot against if you are currently struggling with the “Windows 10 Installation has Failed” error: Now that we went over every potential cause of the error, let’s go over each confirmed fix. The methods featured below will help you get to the bottom of the root cause that’s triggering the ‘Installation has Failed‘ error when trying to install Windows 10.
1. Meet the minimum requirements
The very first thing you should do if you’re trying to install Windows 10 on a less powerful PC is check that the current configuration meets the minimum requirements. You can find these minimum specifications for Windows 10 below:
Processor: 1 gigahertz (GHz) or faster processor or SoCRAM: 1 gigabyte (GB) for 32-bit or 2 GB for 64-bitHard disk space: 16 GB for 32-bit OS or 20 GB for 64-bit OSGraphics card: DirectX 9 or later with WDDM 1.0 driverDisplay: 800 x 600
If any of the components featured above are below the minimum threshold, you will not be able to install Windows 10 conventionally. In case you are above the minimum requirements, move down to the next method below in order to try troubleshooting against a potential power management cause that’s triggering the “Windows 10 Installation has Failed” error.
2. Remove all non-essential peripherals
Some users have confirmed that the error message stopped occurring after they disconnected every unnecessary peripheral. This will also address a potential power management issue facilitated by a peripheral that requires more power than the power supply is capable of providing while upgrading the OS. We can’t give you a definitive list of situations where this problem occurs, but you can try disconnecting all non-essential peripherals until you narrow down the source of your particular issue. If your power supply unit (PSU) is not sufficient to sustain all your USB-connected devices, you might experience the ‘Installation has Failed’ error because your system is unable to provide the required power. This is specifically reported to occur with configurations that have external hard drives connected through USB. If this scenario is applicable to your current situation, try removing the external hard drive (if applicable) and see if you still get random disconnects. If the error stops occurring after you disconnect external devices and you plan on fixing the issue without losing any functionality whatsoever, you can get it fixed in two different ways:
Get a higher PSU that is able to provide more power to your USB-connected devices. Of course, this is only applicable with desktop configurations.Get a USB hub with an external power supply. This should be the fix if you’re encountering the issue on a laptop or ultrabook. USB hubs with included power adapters will take the load off your PSU.
If this method is not applicable in your particular scenario or it didn’t make a difference, move down to the next method below.
3. Uninstall conflicting language packs
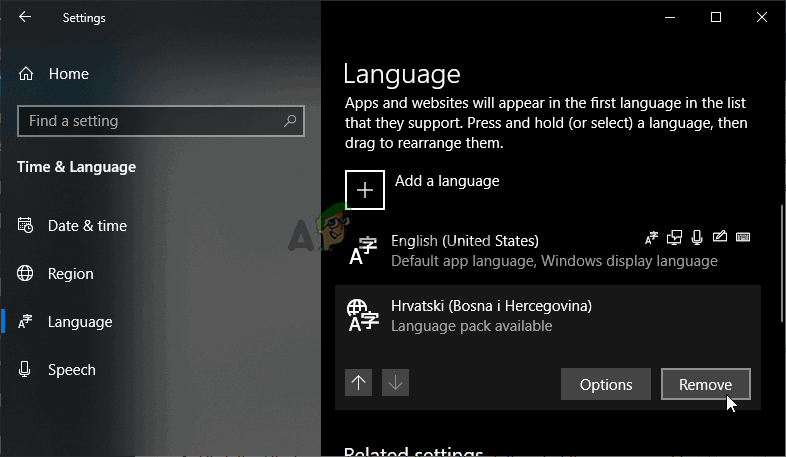
If you have numerous secondary language packs installed on your current Windows installations, you should invest the time to uninstall them – get rid of every superfluous language pack and keep only the active language. Many PC users encountering this error have verified that after they did this, they could bypass the “Windows 10 Installation has Failed” error. This workaround will work on an older Windows version when trying to upgrade to 10 and also on an existing Windows 10 PC (when attempting to clean install a new version). However, since the exact instructions for getting rid of every unnecessary language pack is different on every Windows iteration, follow one of the sub-guides below to get it done.
3.1. Uninstall language packs on Windows 10
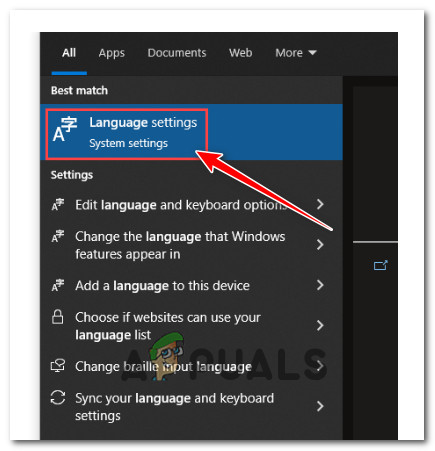
If you’re on Windows 10, you’ll need to get this done from the Language Settings menu. You can access it directly from your taskbar menu, as seen in the instructions below:
3.2. Uninstall language packs on Windows 8.1. / 7
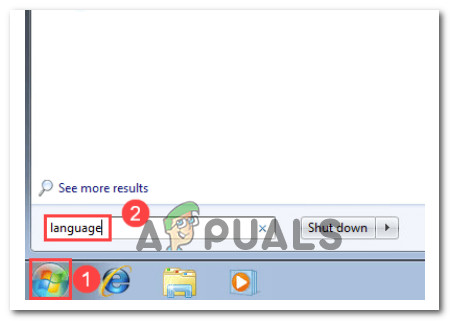
If you’re using Windows 7 or Windows 8.1, you will need to uninstall the extra languages from the Change display language tab. Follow the steps below for specific instructions on how to do this: If this method was not applicable or it didn’t make a difference after you removed the unnecessary language packs, move down to the next method below.
4. Clear the Attributes cache
This error can occur if you’re using certain Windows 10 installers. These installers may try to overwrite some common installation files that are located in the $WINDOWS.~BT folder. To prevent this from happening on your machine, you’ll need to clear the attributes from the installation folder. In some instances, the Windows 10 installer may attempt to overwrite (copy) the installation files in a folder named $WINDOWS.~BT on your local disk. This problem has been reported by some users as occurring when the installer tries to copy the files twice consecutively but fails, causing an error message. To try and resolve the problem, follow the steps below: If the problem is still persisting, move down to the next method below.
5. Disable / Uninstall 3rd party antivirus
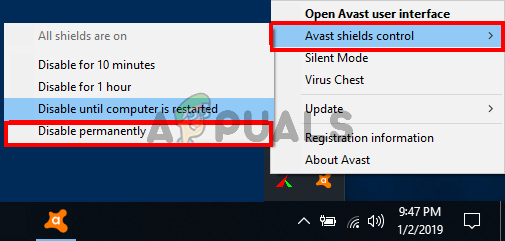
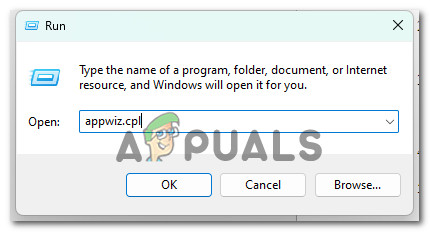
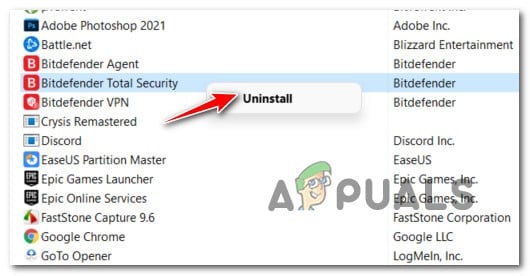
Certain applications can prevent Windows 10 from installing correctly. The most common offenders are security suites and firewalls. An overprotective antivirus can sometimes block data transfer between your PC and the Windows server that is used to download the installation files during the upgrading or clean installing operation. Other users who have dealt with this issue have found that it was resolved after they either disabled or uninstalled their 3rd party security suite. Note: This method is only for those of you using a 3rd party security suite, not Windows Defender Security Center. If you are using an external antivirus without a firewall component, you should be able to resolve the issue by disabling real-time protection. In most cases, you can do this by accessing the tray icon for your AV software. If your 3rd party security suite includes a firewall component, you will need to uninstall the suite temporarily (at least until they resolve the compatibility issue). Follow the steps below to do this: If this method was not applicable or you’re experiencing this issue due to a different root cause, move down to the next method below.
6. Rename the install folder
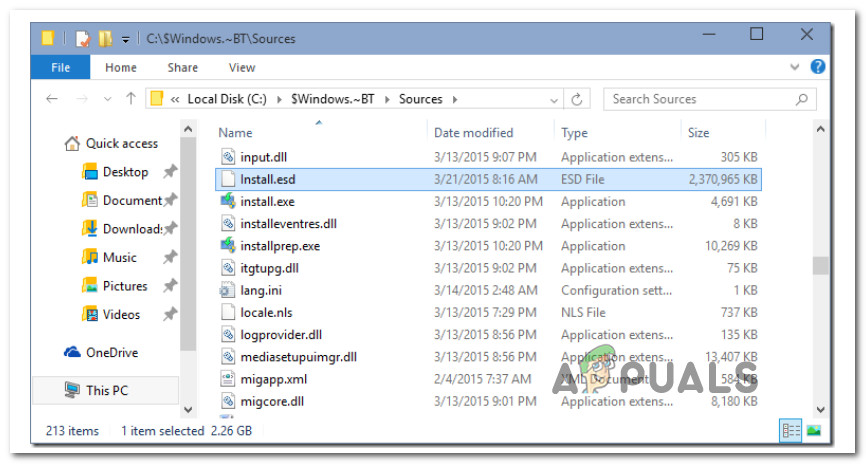
Windows 10 has released a few installers that might cause this behavior unless you tweak the main installation file. If you get this error while trying to install Windows 10 PRO, you should try renaming the install.esd file to install.wim in order to make the error message go away. A bug has been found in the Windows Media Creation Tool, which causes it to rename files incorrectly. This can cause problems when trying to install a DVD, as the file named ‘install.esd’ should actually be named ‘install.wim’. However, this is easily fixed by simply renaming the file to ‘install.wim’. Follow the instructions below for specific instructions on how to do this: If you’re still experiencing the same kind of issue, move down to the next method below.
7. Repair the BCD Config
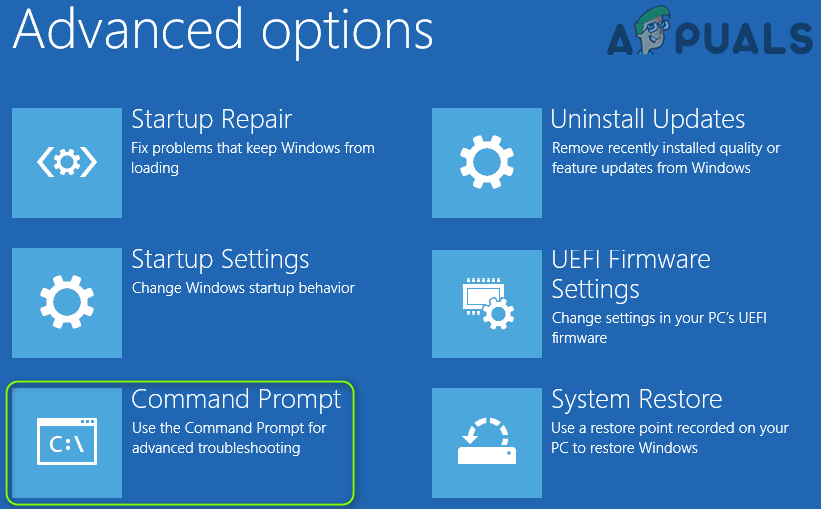
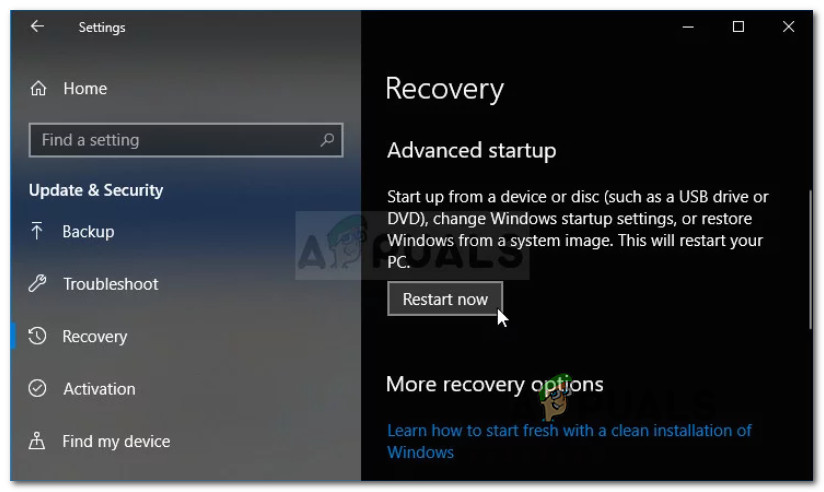
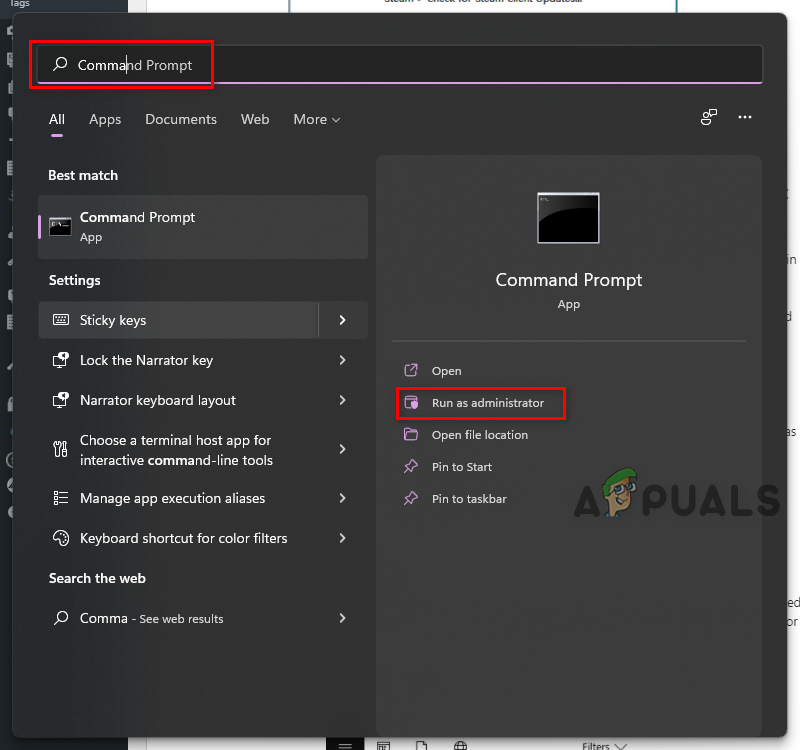
Troubleshooting a potential system file corruption issue? First, check that the BCD datasets are intact. BCDs are primarily used during boot, but a corrupted BCD dataset will affect an upgrade operation. If this is your scenario, open an elevated Command Prompt. Troubleshooting Windows installation can be made much easier by running through some essential commands related to the boot manager. There are several methods you should employ in a particular order to reset and reboot the Boot Manager service, which is directly responsible for Windows update and installation. Here’s what you need to do: NOTE: If your computer’s system is down, you will have to use the installation media used to install windows for this process. If you’re still experiencing the same Windows 10 Installation has Failed, move down to the next method below.
8. Install in Clean Boot Mode
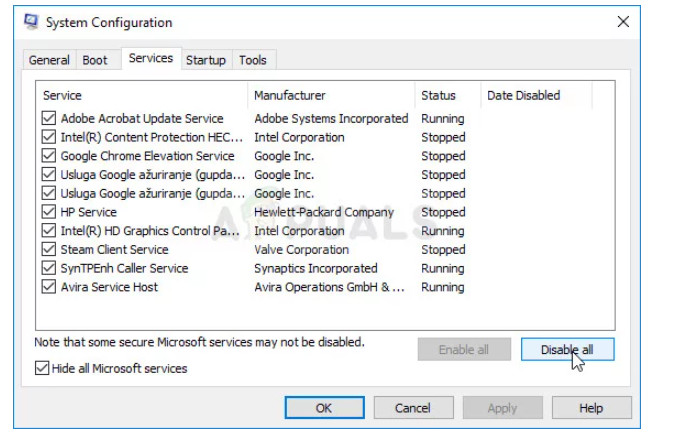
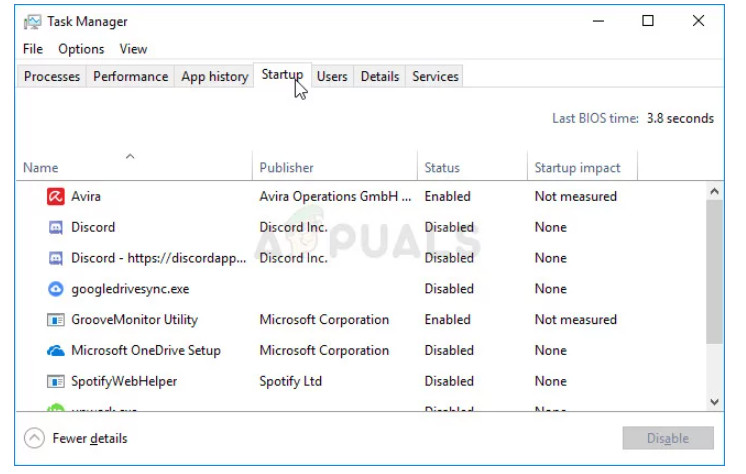
There are a few other programs and services which can interfere with the installation process of Microsoft Windows 10. And if you got this far, you already confirmed that your active 3rd party antivirus (if you’re using one), is not on that list In most situations, the problem is caused by the antivirus you have installed. Try disabling it while the installation runs. However, to ensure nothing will interfere with the installation, we recommend you clean the boot. Note: This will disable all non-Microsoft programs and services from starting up. You can return back to normal mode once you’ve finished successfully. Here’s what you need to do: If you already went through this and you’re still experiencing the same type of “Windows 10 Installation has Failed” error when attempting to install Windows 10, move down to the final fix below.
9. Repair Corrupted System Files
One potential reason you might see the error message “Windows 10 Installation has Failed” is if a key system dependency, process, or service is corrupted and cannot be swapped out for a new one during the upgrade process. In this case, you can try running SFC and DISM scans, using System Restore, or performing a repair or clean install of Windows 10. We suggest doing everything mentioned above in the same order as explained below.
9.1 Deploy SFC and DISM scans
To begin, you can often fix the issue by using utilities like DISM (Deployment Image Servicing and Management) or SFC (System File Checker). Both of these programs will repair corrupted system files, but they do so in different ways. Note: SFC uses a local cache to replace corrupted files with healthy ones while DISM downloads fresh copies from Windows Update. If you believe system file corruption might be to blame, we recommend running both of these utilities in the order below. To perform an SFC and DISM scan in quick succession:
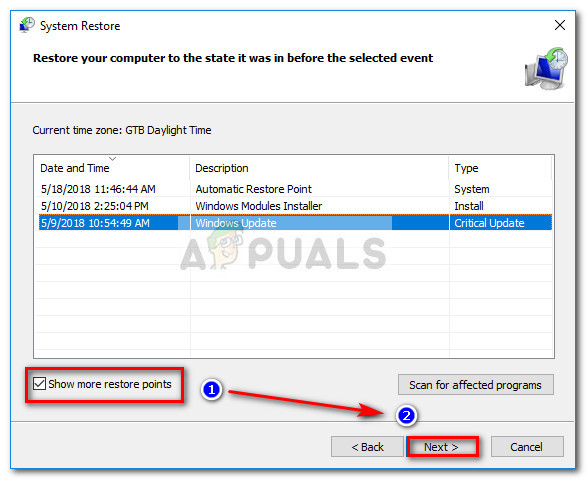
9.2. Restore PC to Healthy State via System Restore
If the first method wasn’t effective, it’s evident that the problem is happening for one of two reasons – either a system file corruption issue went undetected by the scans above or some software conflict. Fortunately, if the issue only started recently, you should be able to easily resolve it just by using a system restore point to bring your computer back in time to a healthy state. If you’re lucky and have a system restore point dated shortly before the issue arose, the steps below should help you resolve the problem. Keep in mind that this method will erase all changes made since the system restore point was created. All apps installed, system preferences adjusted and everything else will be gone. If you’ve decided to do a system restore, here’s what you need to do:
9.3. Clean install or Repair Install
If you got this far, the problem you’re dealing with is most likely caused by system file corruption that cannot be resolved using conventional methods. In this case, the best way to fix the problem without doing a complete OS reinstall is to refresh every Windows component (including boot data). There are two options to choose from:
Repair Install – This procedure (also known as in-place repair) is more tedious. It requires you to provide an installation media, but the advantage is that you get to keep all your personal files (including personal media, games, applications, and even some user preferences) without having to backup them in advance.Clean install – This is the easiest procedure. You don’t need any installation media and you can initiate it directly from the menu of Windows 10. However, you will lose all your personal data if you don’t back it up before initiating this procedure.
FIX: Windows Defender Error The service couldn’t be started Error code:…How to Fix PlayStation “An Error Has Occurred” (no error code)?Fix: Error 1310 Error Writing to FileFix: DirectX Setup Error ‘An internal error has occurred’ in Origin
