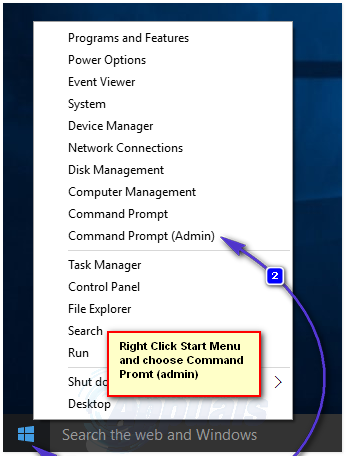
Right-click on the Start Menu button to open the WinX Menu. Click on Command Prompt (Admin) in the WinX Menu.
Type the following command into the elevated Command Prompt and then press Enter: Once the Command Prompt says that the operation was completed successfully, DEP will have been disabled on the computer. On the other hand, if you want to enable Data Execution Protection on a computer running on Windows 10, you need to: Right-click on the Start Menu button to open the WinX Menu. Click on Command Prompt (Admin) in the WinX Menu. Type the following command into the elevated Command Prompt and then press Enter: Once the Command Prompt says that the operation was completed successfully, DEP will have been enabled on the computer. There is a chance that, if you are trying to turn DEP off on a UEFI-enabled computer (basically any computer that came with Windows 8 or 8.1 out of the box), you will receive an error message that says, “The boot configuration data store could not be opened. Access denied.” whenever you try to execute the commands used to enable and disable DEP in a Command Prompt. If that is the case, make sure that the Command Prompt you use to execute the commands is an elevated Command Prompt that has administrative privileges – titled Command Prompt (Admin) in the WinX Menu. If making sure that you execute the commands in an elevated Command Prompt doesn’t work, you will have to reboot your computer, open its BIOS settings, disable the Secure Boot feature, save the changes and reboot to get the commands to be executed successfully. Once the command have been executed successfully and you have enabled/disabled Data Execution Protection, simply go into the computer’s BIOS settings again and enable Secure Boot as it actually is a useful feature.
How To Enable or Disable Write Protection for a Disk DriveFix: Windows Media Player ‘Server Execution Failed’Fix: Execution of scripts is disabled on this systemFix: The Code Execution cannot Proceed (Edgegdi.dll error)
