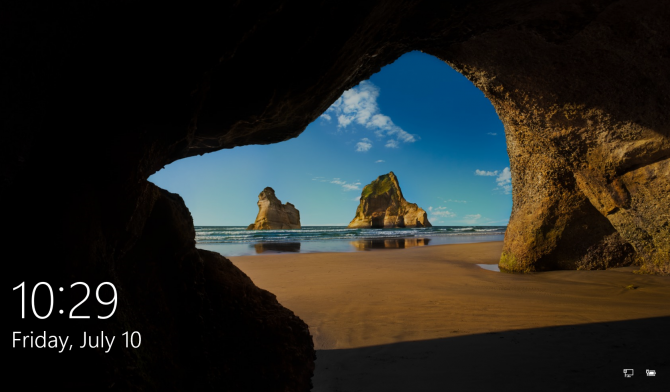
A majority of users don’t like this screen inside Windows 10 as it tends to create obstruction in signing-in rapidly inside Windows. According to them, this lock screen feature is pretty hefty and it increases the chances of entering wrong password while trying to sign-in inside Windows. So, they want to get it removed.
Solutions to Remove the Screen before Password Input:
There are a number of solutions to do this but I would mention only those that are easy to be followed. So, follow these methods in order to remove the screen before password input.
Method # 1: Remove the Screen using Group Policy
Group Policy editor is one of the easiest ways to remove the screen before password input. Follow the steps accordingly.
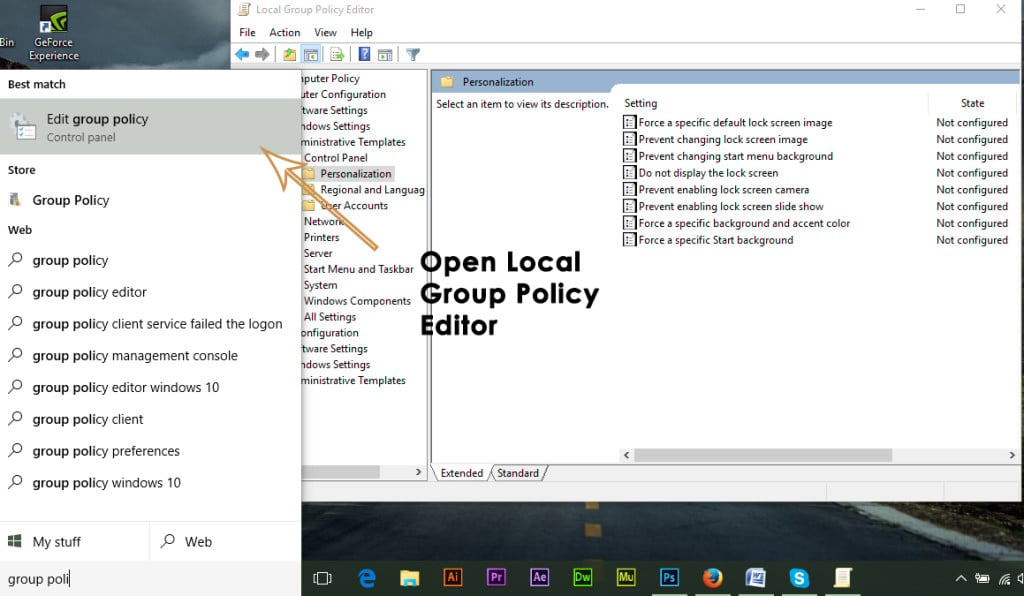
Open the Local Group Policy Editor by searching inside the search field.
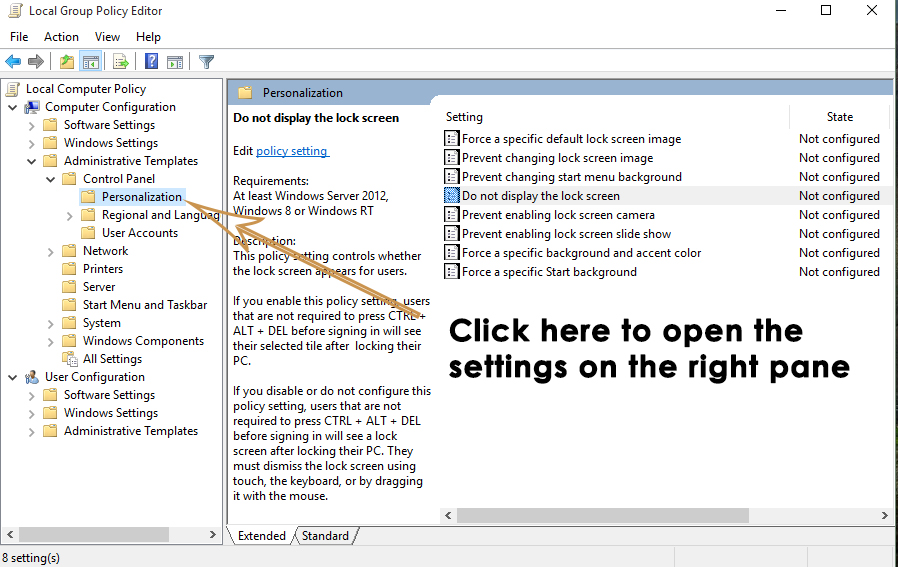
From the left pane, expand the Administrative Templates followed by Control Panel and click on Personalization.
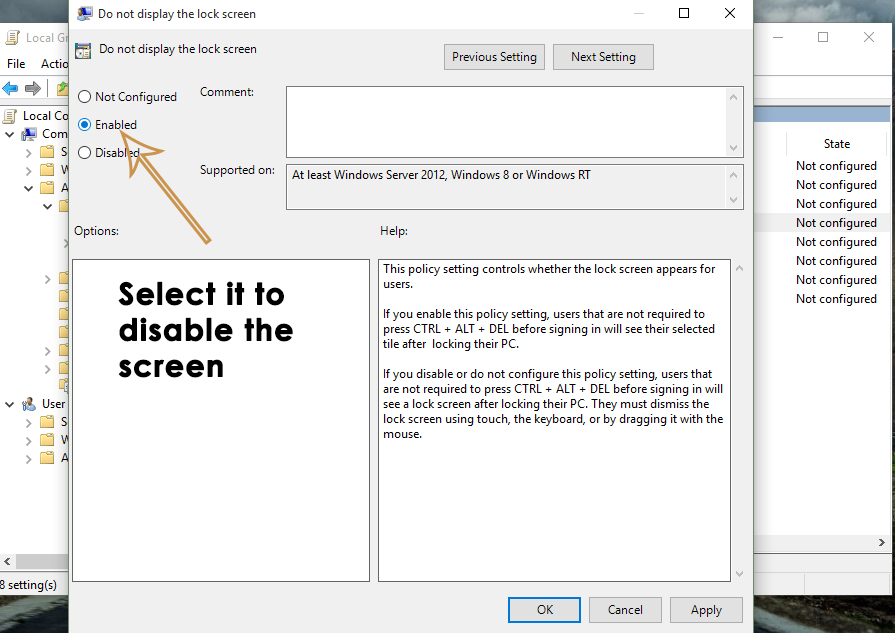
On the right pane, select the Do not display lock screen setting and double click over it to change the settings. To disable the screen, select the radio button labeled as Enabled followed by Apply and OK Check it by pressing Win + L on the keyboard.
Method # 2: Remove the Screen using Registry Editor
Screen before password input can also be removed using the Registry Editor tool.
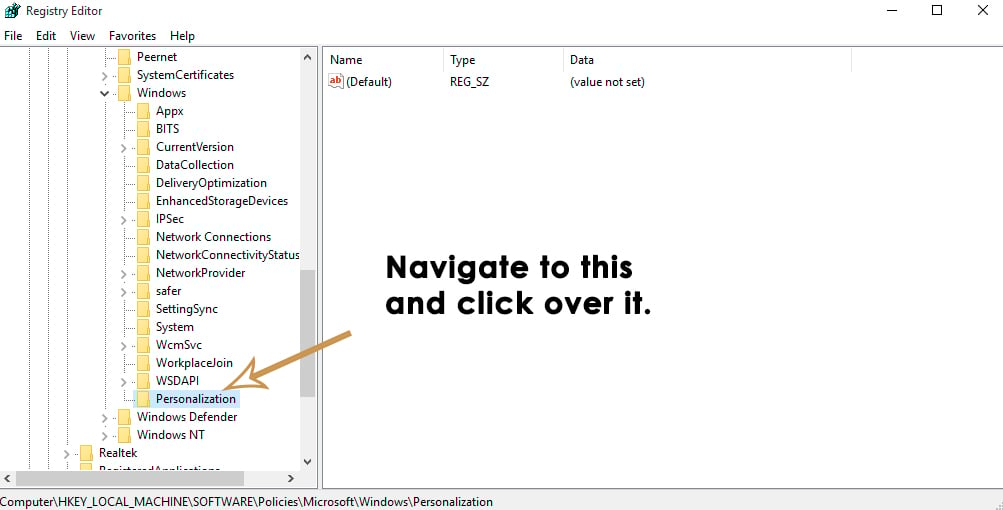
Go to Run command and type regedit followed by Enter Navigate to Personalization through the hierarchy structure mentioned below.
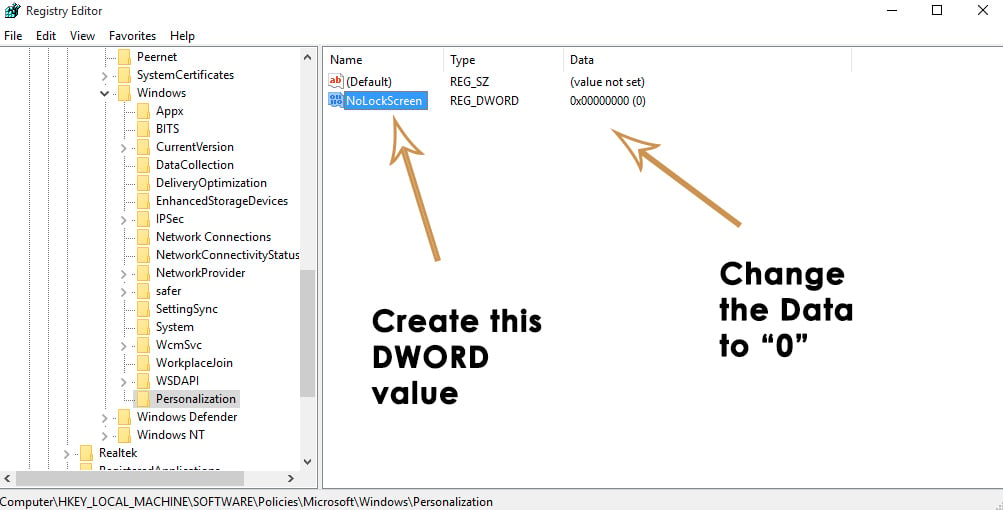
Create a new DWORD value (if not present) by right clicking on the right pane of the Registry Editor. Rename the value with NoLockScreen and change the Data to 0 in order to disable the screen before password input. Close the registry editor and press Win + L to check if the screen is removed.
Fix: Could not open lock file /var/lib/dpkg/lockHow to Remove Padlock or Lock Icon from Files on Windows 10How To Fix Windows Spotlight Lock Screen Picture Won’t Change on Windows 10?Stuck at Lock Screen on Windows 11? Here’s the Fix:
